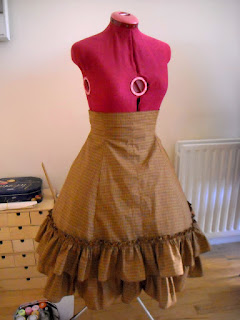
One thing I don't wear often enough is a hakama with my kimono. Kitsuke is easier and you don't have to worry about short kimono and flashing your juban. Also it is brilliant for wet weather as I found out 3 years ago when I decided to walk back home in pouring rain.
However the hakama is not what it seems. There is a lot of fabric in that garment because of the pleats and the length makes it awkward in certain situations.
Therefore my mind though why not make a lolita version? I have been toying with the idea of venturing into wa-lolita but most of the skirts that you can buy will not stretch to my size once I tucked the kimono.
Fabric
As with all my lolita pieces they much be work friendly so it has to be made from something washable and dark coloured.
Luckily I went a bit overboard with the the purchase of black bi-stretch fabric so that is what I will use.
Design
First thing first one must study the hakama.
Lets look at the pleats as to me that defines its.
Here are the front pleats.
And here are the back pleats.
The most obvious difference between the two is the number of pleats, the front has 6 (one of the pleat is hidden under the centre one) and the back has 4.
The only way to show how the pleats work is with a diagram.
As you can see it is a bit complicated but how am I going to incorporate those pleats? Well what is life if it was not for the challenges.
My starting point was this pattern minus the ruffles and the high waist part.
Then I inserted the pleats using a lot of masking tape. Luckily I was decorating at the beginning of the year so a roll was at hand but I much buy some more.
Construction
First thing first I needed to re-thread my new toy! My overlocker.
Now that is done, time to cut it out.
A straight line stitch on the inner pleat to hold it in place.
Side pleat pinned and ready to be stitched into place
And the ironed creased. A lot of steam and a wet cloth was used to create this.
Oooo a closeup of the back pleat. I had to stitch the back pleat together to check them in place. Otherwise they would flap about and I could have made a mistake.
Time to join the back 3 panels.
And this is where my overlocker came in handy. It finished off the edges so nicely, I love my new overlocker, look how pretty the edges are.
Okay that is the back half of the skirt all done on to the front with more pleats.
Unfortunately no photos of the intermediate steps for the front panel as I was concentrating hard to make sure I ironed and stitched the right pleats.
Here you can see what it looks like at the back and the stitch that is holding the pleats in place.
Don't worry, the yellow thread is to hold the pleats in place while I am making the skirt. Seriously they really got in the way.
Okay the back and front are done,time to join them at the side.
The side seams didn't quite line up as nicely as I hoped.
The other side is a little better but still improvements for next time.
However not bad for a first time and I know where on the pattern to make it work.
Now the straps. May have made a bit of a mistake in that the front straps are ridiculously long. as in 4.5 metres in total. Yeah next time make them shorter but at least they will go wrong my waist easily!
Yep you guessed it I forgot to take photos. I only attached them just before dinner and I wanted them on so that afterwards I could take photos of what the skirt looks like on Miffy 2.
It is going according to plan, just the lace at the bottom and we are done.
Finished
And here it is! I have to say it has turned out very well indeed.
An a-line lolita shirt with hakama pleats.
I did find one advantage of long straps and its that I can tie a double bow which is super cute.
The lace at the bottom gives the skirt a nice edge I think. Without it I think it would have looked too plain for lolita.
The pleats are holding well!
They are staying closed when they are not moved.
It is not very poffy the petticoat but I'm quite like it as suits me better for my day to day wear.
And here are the pleats opened. Crisp and clean creases.
Here you can just about see the hidden middle pleat.
Now I have a work event on the 6th so I might wear it them.


3 comments:
Lovely and such a clever construction puzzle solved. Thanks for sharing.
Oh my, that's such an adorable outfit!
I admire your talent! Amazing job!
☆ Ink & Sword Lifestyle Blog ☆
☆ Shiro Samurai's Kimono Blog ☆
Thank you!
Hopefully I will get a chance to make a more everyday hakama skirt which will be more suitable for the office.
Post a Comment