Showing posts with label skirt. Show all posts

4 September 2017

Making a dress - Simple black underskirt

Inspiration

Well now I have a white one, I might as well have a black one.

You can not go wrong with black and white as your base colours.

Design

This one is going to be a tiered skirt because I don't have one yet in my collection.

However this one will have side pockets which will be hidden by the top tier of ruffles.  Sneaky I know!!!

Construction

Oh god please remind me why I thought using this fabric was a good idea?  It is sooo slippery and frays at the slightest touch.  Thank god I have an overlocker.

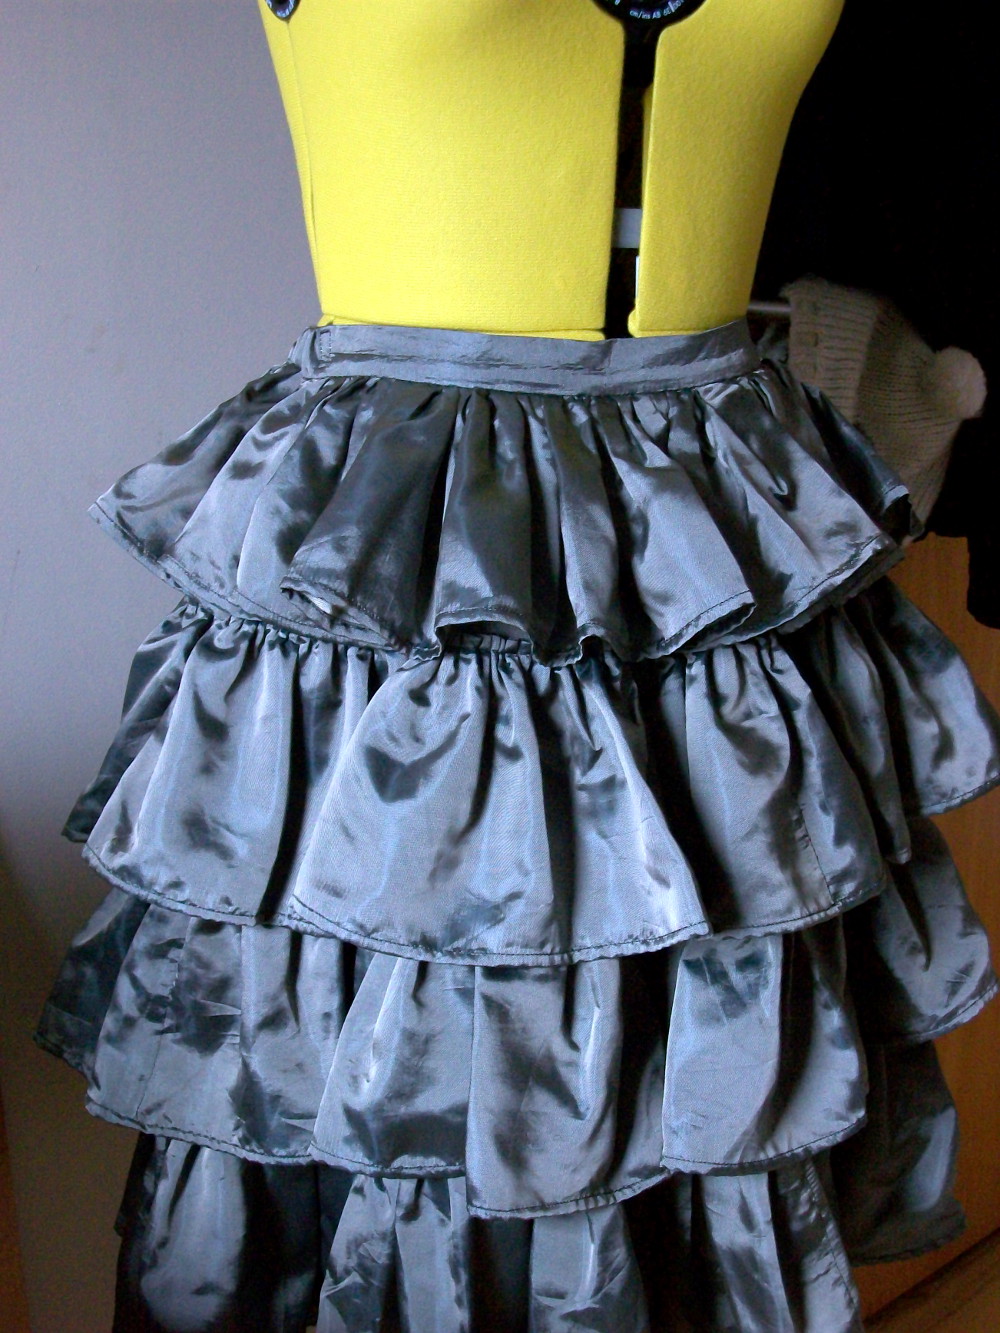
So many ruffles!!!!


This is only the third tier and I think I was going mad.


Finished

However the result is this!


So many ruffles.


And best of all POCKETS.

Conclusion

Don't use lining like material again.  NEVER.  Right lets see how long I will keep this promise.


And due to the fabric choice there were a few mistakes like my side pocket seam not quite aligned nicely.  Well I was sewing 4 slippery layers is not easy even at slow speed.


However it is not impossible as you can see here on the other side, much nicer.


Oh yeah top layer was not long enough.  Boo hoo, it seems I was not careful enough.


And as a result the top tier sticks out more then the rest.  But it seems less noticeable when I put on an a-line petticoat.

2 April 2017

Making a Dress - Lolita Apron Dress

It has been too long!

Really it has and I have no real excuse but sewing, games and kanzashi have been taking up a lot of my time and unfortunately I always get carried away and forget to update you lot.

So start now I will do my best to report on each of my new creations whether it is sewing, kanzashi or kimono.

So today I have for you my latest sewing project completed today.

Inspiration

Continuing on with my aim to make a lolita work wardrobe I have decided it is time to make another apron style JSK.  They are very versatile as they can be paired with any of my work shirts and are very comfortable.

As always my Otome no Sewing mooks have come through and I have found the one I will based my JSK on.


As this is for work, I omitted the shoulder frills, lace and pintucks along the bottom.  I wanted this to me nice and simple so it could be worn often and it can be washed easily.

Fabric

Finally I am able to make a little dent in my fabric hoard and I decided on a nice grey with shots of red kimono bolt.


There is a faint floral pattern woven into the fabric as well which make it a little more interesting.

Construction

As with all my dresses made from kimono bolt is the width of the fabric.  Luckily the bodice pieces all fit perfectly and although the pattern calls for a circle skirt I went a rectangle skirt to make things easier (oh famous last words).


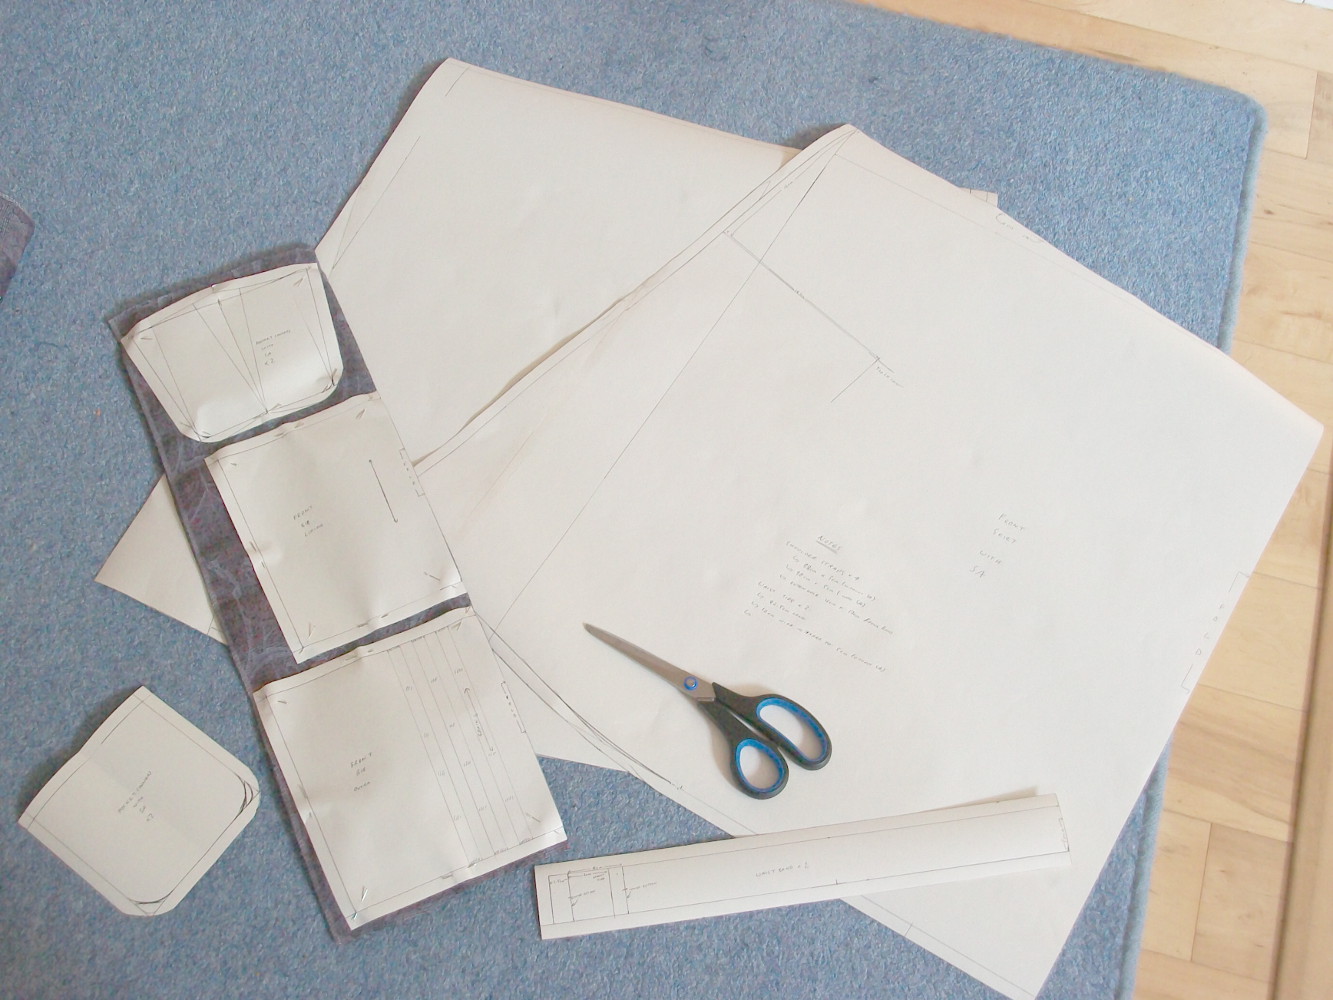
 Here are pockets and bodice pieces on the fabric.


And here is where the construction photos ends.  I always end ups sewing in the afternoon and the lighting in my flat is terrible so photos are the last thing on my mind.

I will try better in the future.

Finished Dress

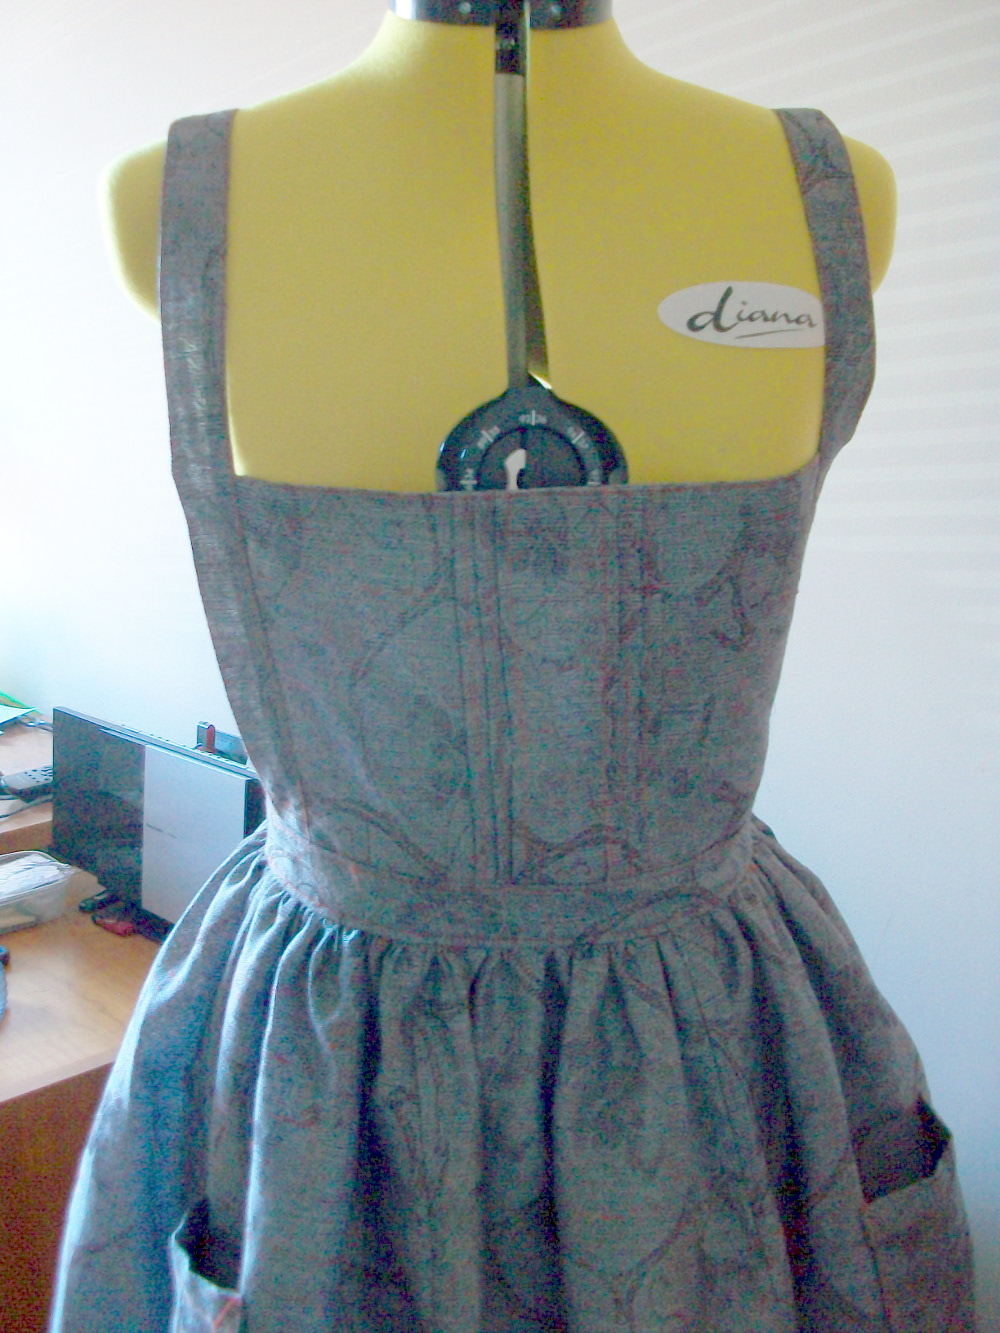
Here it is!

Isn't is dainty?


As I used no trimmings on the dress I decided it was a good time to practice my topstitching.  I used red thread to complement the red in the fabric.


As always a lovely bow is needed.


I may have made it a little small on the waist but I had just had my lunch so maybe that is the reason for it being tight?  Well it is a good enough excuse.


And I can't live without pockets so this one just had to have them as well.

Now time to look at my to-do list and tick some things off.

28 March 2016

Making a Dress - Lolita hakama skirt

Inspiration

One thing I don't wear often enough is a hakama with my kimono.  Kitsuke is easier and you don't have to worry about short kimono and flashing your juban.  Also it is brilliant for wet weather as I found out 3 years ago when I decided to walk back home in pouring rain.

However the hakama is not what it seems.  There is a lot of fabric in that garment because of the pleats and the length makes it awkward in certain situations.

Therefore my mind though why not make a lolita version?  I have been toying with the idea of venturing into wa-lolita but most of the skirts that you can buy will not stretch to my size once I tucked the kimono.

Fabric

As with all my lolita pieces they much be work friendly so it has to be made from something washable and dark coloured.

Luckily I went a bit overboard with the the purchase of black bi-stretch fabric so that is what I will use.

Design

First thing first one must study the hakama.


Lets look at the pleats as to me that defines its.

Here are the front pleats.


And here are the back pleats.


The most obvious difference between the two is the number of pleats, the front has 6 (one of the pleat is hidden under the centre one) and the back has 4.

The only way to show how the pleats work is with a diagram.


As you can see it is a bit complicated but how am I going to incorporate those pleats?  Well what is life if it was not for the challenges.

My starting point was this pattern minus the ruffles and the high waist part.


Then I inserted the pleats using a lot of masking tape.  Luckily I was decorating at the beginning of the year so a roll was at hand but I much buy some more.

Construction

First thing first I needed to re-thread my new toy!  My overlocker.


Now that is done, time to cut it out.


A straight line stitch on the inner pleat to hold it in place.


Side pleat pinned and ready to be stitched into place


And the ironed creased.  A lot of steam and a wet cloth was used to create this.


Oooo a closeup of the back pleat.  I had to stitch the back pleat together to check them in place.  Otherwise they would flap about and I could have made a mistake.


Time to join the back 3 panels.


And this is where my overlocker came in handy.  It finished off the edges so nicely,  I love my new overlocker, look how pretty the edges are.


Okay that is the back half of the skirt all done on to the front with more pleats.


Unfortunately no photos of the intermediate steps for the front panel as I was concentrating hard to make sure I ironed and stitched the right pleats.  


Here you can see what it looks like at the back and the stitch that is holding the pleats in place.


Don't worry, the yellow thread is to hold the pleats in place while I am making the skirt.  Seriously they really got in the way.

Okay the back and front are done,time to join them at the side.


The side seams didn't quite line up as nicely as I hoped.


The other side is a little better but still improvements for next time.


However not bad for a first time and I know where on the pattern to make it work.

Now the straps.  May have made a bit of a mistake in that the front straps are ridiculously long.  as in 4.5 metres in total.  Yeah next time make them shorter but at least they will go wrong my waist easily!

Yep you guessed it I forgot to take photos.  I only attached them just before dinner and I wanted them on so that afterwards I could take photos of what the skirt looks like on Miffy 2.


It is going according to plan, just the lace at the bottom and we are done.


Finished

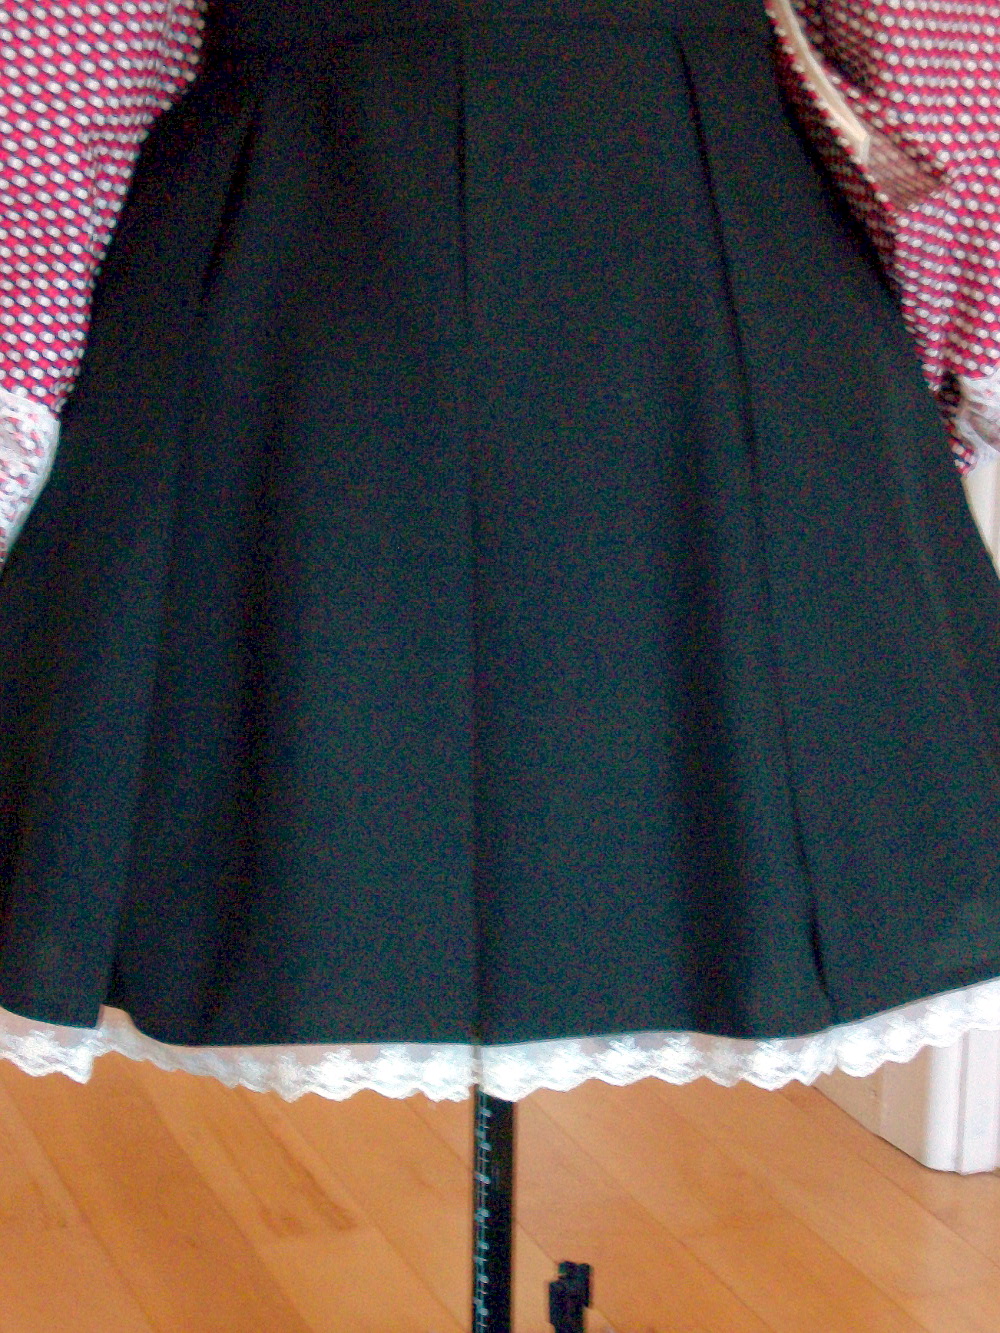
And here it is!  I have to say it has turned out very well indeed.


An a-line lolita shirt with hakama pleats.  


I did find one advantage of long straps and its that I can tie a double bow which is super cute.


The lace at the bottom gives the skirt a nice edge I think.  Without it I think it would have looked too plain for lolita.


The pleats are holding well!


They are staying closed when they are not moved.


It is not very poffy the petticoat but I'm quite like it as suits me better for my day to day wear.


And here are the pleats opened.  Crisp and clean creases.


Here you can just about see the hidden middle pleat.


Now I have a work event on the 6th so I might wear it them.

4 May 2015

Making a Dress - Green Jumper Skirt with matching french hood

For ages I have been waiting for a particular JSK or jumper skirt design to appear in Otome no Sewing book and finally in volume 6 it has arrived!

Inspiration

I just like the look of them for some reason.

Fabric

I wanted this one to be hard wearing so rather then going for 100% cotton I decided to buy something call bi-stretch.  It feels like the fabric the school uniforms are made from which means it will be hard wearing!

And despite the fabric being polyester, it has a lovely drape to it and the assistant at the fabric shop that I brought it from said that it is very popular with costume designers because of the drape.  Which is good.

Green was not my original colour of choice, it was going to be black but then I looked into my wardrobe and just saw a see of blue and black lolita dresses.  This will not do so I thought what colour do I like that I have not made any clothes for.  Then as I was looking through my fabric stash I noticed my green kimono bolt.  That was it green!  I will make the dress in green.

Design

No major changes were made to the pattern apart from three things.

One, I decided from now on that I will add side pockets to all of my dresses if I can.  This is to make them more practical because my aim is to make a work friendly lolita wardrobe.

Two, I added some ruffles at the bottom.  The original pattern asked you to make this dress out of tartan material but since tartan is not my thing I decided that a row of ruffles would be the best replacement.

And three, I was to fully line the jsk.  Maybe that is a major change?

But it needed some trimming and for some reason I wanted it to be gold.  Somehow in my head I wanted the jsk to look a little military-like but I knew gold lace would be impossible to find.  So as I was buying my green bi-stretch at the fabric store only a 1 minute walk away from work, I spied some gold trimming.  Perfect and brought 5 metres worth.

Construction

Everything went according to plan.

Pockets went in nicely, the trimming was sewn over the seams and overall everything was going smoothly.....until I had to put in the invisible zip.

My first attempt resulted in the fabric getting stretched and therefore when I did the zip up it was all puckered.  I was very disappointed in myself so I took the zip off and in the process I accidentally stuck my seam ripper in the wrong place and ruined the zip.  D'OH!

Anyway with a replacement zip brought the following day, I managed to get the new zip in.  Still had some trouble as the gathers near the zip where stopping it from going up.  So I had to had stitch those down flat and then add in a little eye and hook to take some of the weight off the zip.


Yey for pockets!


As with all my projects, I always try to make a matching headdress because I love accessories so I thought I would make a french hood inspired hairband.

I toyed with the idea of actually putting it on a hairband but they never stay in my hair for long so I stuck with ribbon tying instead.

The base design is from one I saw online but I tweaked it a little wasn't as big.  Then the fun begins.