Showing posts with label patternmaking. Show all posts

5 August 2017

Making a dress - Hanfu top

Inspiration

So I have the trousers and the jacket but now a top would be nice.  Of course it is is a nice day a strapy top could be used which would mimic the wraparound top nicely.  However what about the colder days?

There I would a proper top or shirt in my work world wardrobe.

Design

Luckily there is a pattern for this.

https://torguqin.wordpress.com/2010/07/17/ganlings-shuhe-duanda-patterns/

Okay it is not correct for the period but then again I am not going for historical accurately here.

I had to tweak a little around the shoulder area because I learned from the jacket that I have wider shoulders then the patterned allowed.


Ever the hoarder of fabric now, I had some cream polycotton lying around.


Construction

I decided to tackle this in a serious of rectangles and then make the adjustments for the collar and sleeves once the fabric is all sewn in place.  This will save time in figuring out how long each piece of fabric has to be.


Now lets attached the front overlap to the main body.


Then the sleeves.


Now to taper the sleeves to the final shape.


Now to play with the collar and front.


Now to sew the sides and sleeves and add a collar and we are done.  


If you are wondering how I finished the seams on the body, I flat-lined them.

Finished

I don't know why I did not take any pictures of it when it is finished but here it is in action with my hanfu suit as I am going to called it.


Conclusion

I know I made the top for winter but it is still a bit too thin for my liking.  So this is now a summer top.

It is also on the see through side so I will need to wear a top inside as well.  Yeah not quite turning out as planned I have to admit but it was a good exercise and now I know what fabric I need to aim for in the future.  Thick cotton!

I do love the long and flowing outline of this outfit.


Will need to make the trousers shorter as they are a bit too long for office wear but are probably the correct length for the style.

Now when will I find the time to wear it??


23 July 2017

Making a Dress - Qi-lolita Overdress

Inspiration

Now I have conquered my fear of wa-lolita it is time to turn my attention to qi-lolita.

Well it seems only fair that I do, since I am Chinese so it is a sub-style most suited to my culture.

Design

Luck would have it Otome no Sewing book 10 had two patterns for an qi-lolita overdress.  They are pretty much the same expect where the dress is split.

I went for the side split one.

Of course the book is recommending that I use chinese brocade but this would be a bit outrageous for work so I went for my trustworthy black bi-stretch but to add a little colour I would be using red lining and some red cotton trim.

Construction

During my shopping trip I could not find any decent red trim so I brought some white cotton trim that I liked and decided to dye it.  

Going well...


Unfortunately it is not as red as I hoped but maybe that is for the best.

Now to tackle the pattern.


Looks like I will need to add a little width as it is a little tight on my Miffy 2.  I want to be able to wear this at work and most importantly move.


There that should make it a little more comfortable to wear.

And then I forgot to take construction photos apart from when I finished sewing in the lining for the zip.


and sewing the armholes.


Sorry must try harder in future.

Finished

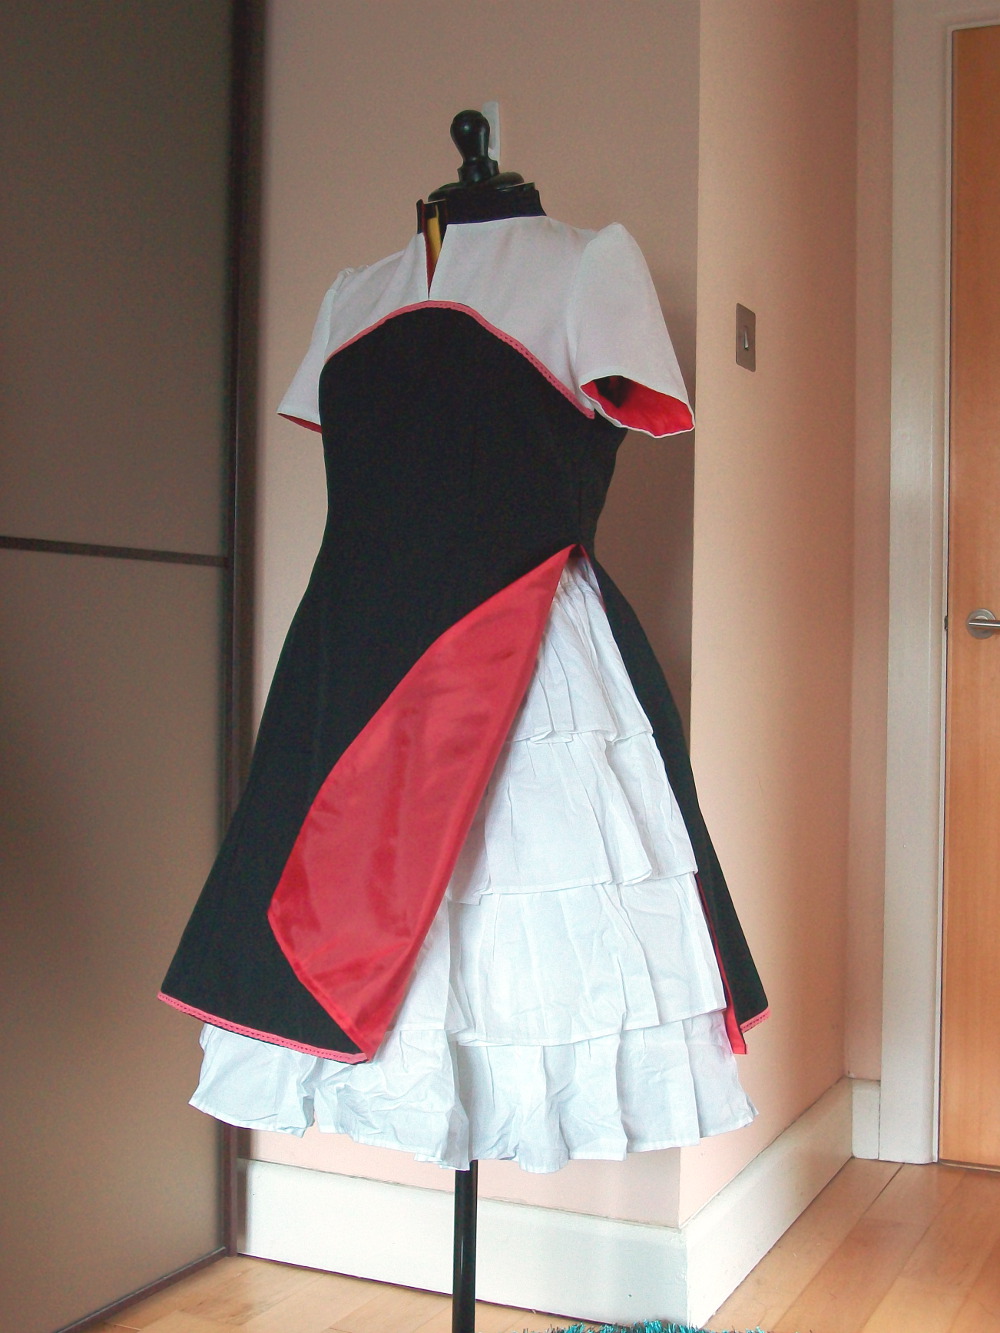
Ta-da here it is!


I have paired it with my cotton tiered undershirt but I plan to make another one that is easier to look after for work.


Closeup of the top part which still needs some button closure but I can't decide what style.


The back which involved a lot of hand sewing for the invisible zip because of my use of the lining.


Since it was such a plain overdress I went for a bright and colourful lining.


One slight problem is that my seams don't quite match up on the back.  I am always a millimetre out for some reason even though I take so much time to line them up.

Conclusion

I really enjoyed making this overdress as I have been wanting a qi-lolita outfit for ages.  I would like to make another one just because I love the look.

Although next time I will make the side slits a little shorter as they go right up to my natural waist!  So I have to make sure I wear a strappy top.


23 May 2017

Making a Dress - Modern hanbok (dress)

Inspiration

So I have a jeogori but now I need a dress.

Lucky a modern hanbok/dress seems to be simple enough although this time round I am going to concentrate on a some elements.

One, pleated skirt.  That seems to be a defining feature on a lot of the dresses I have seen.


Two, this is not on all of them but on lots of the Leesle dresses they have a little loop on the front for a decorative accessory.  How cute is that?  Definitely putting this in.  If not for decoration, I could make a little purse to put some change.


Three, as you can see from the pictures above they are quite high waist.  Normally hanboks are quite quite up the chest, similar to empire line dresses so this seems only natural.

And for me an additional feature I want to put in is pockets.  I really can not live without pockets and it is annoying that modern day dresses that you buy these days seem to be lacking them.

Design

So time to trawl through my Otome no Sewing for a suitable pattern.

This time it is Book 8!


The two major changes.  One, I made is the neckline as this one is suppose to be square but I am aiming for a rounded one and two, the skirt will be pleated rather then gathered.


Now as I have just come back from Hong Kong with a few metres of fabric I thought I might make this dress out of the light denim I brought.


I need some lining as I have decided that all of my dresses will be made with lining unless it is a design feature.  Luckily I had some polycotton lying around from an order I made a while ago.  Yep it is multicolour dots.  Well at least it will be fun!


Construction

This all started off very easy.  Cut out the bodice pieces and sew them all together.  This was done in one weekend.


Then came the fun part, the pleated skirt.  My first pleated lined skirt with pockets!

Now I have made pleated skirts before but the lining has never been attached the lining to the skirt and never with pockets so this took a bit of thinking.

Measurement-wise I use the times 3 formula and cut out 3 panels.  One for the front and two for the back in both the outer and inner fabric.  I used the off-cuts from the main fabric to make the pockets as I didn't want to cut up more of my precious fabric from Hong Kong.

Now how should one sew pockets into a lined pleated dress?  Should the pockets go in-between the outer fabric and lining or behind it all.  It turned out that it had to be the latter because I didn't want my pleats to sit neatly into each other.


And that is when things went a little bit tricky.  Because I went with this method, I was essentially sewing my lining to the main dress.  This mean I have to be careful with construction or I could inadvertently twist things or worst sew my pockets in the wrong direction.


In the end it turned out fine although one of the pockets there is a little puckering on the outside but luckily this will be covered up by pleats!

Then I had a bright idea!  I should use some of the light blue and white striped trimming I brought for the loose sack dress!  It is the perfect colour.

If I just sewed the trimming onto the main outer fabric it would have been simple but no I decided to sandwich it between the lining as well.  My reason for this is to remove as many raw edges as possible as I wanted a professional finish.

However because of the way I sewed the pockets, I had to sew the trimming in two parts because I was not able to flip the fabric but no matter I somehow managed it.

Now to pleat the skirt and attach it to the bodice.


Add in an invisible zip and finally sew down the bodice lining.

Finally press with vinegar and a steam iron to set the pleats and ta-da one modern hanbok


Finished

Here it it.  The front.


With my fleece jeogori.


The little loop for hanging a little ornament.


Pockets!


Conclusion

There are small imperfection that I have noticed.

One, the pleats are not lined up perfectly with the pocket so you can see the opening.  You see it in the above image.  I could have tried harder but pleating is a pain with two layers so next time it will be better.

Two, I have never been able to add in a zip without some bunching of fabric but luckily the pleats will hide that ;)

And three, pleating.  It is a bit uneven but it can't be helped I suppose since I am folding two layers of fabric and each one slip past each other.  I suppose I need more practice here.

28 March 2016

Making a Dress - Lolita hakama skirt

Inspiration

One thing I don't wear often enough is a hakama with my kimono.  Kitsuke is easier and you don't have to worry about short kimono and flashing your juban.  Also it is brilliant for wet weather as I found out 3 years ago when I decided to walk back home in pouring rain.

However the hakama is not what it seems.  There is a lot of fabric in that garment because of the pleats and the length makes it awkward in certain situations.

Therefore my mind though why not make a lolita version?  I have been toying with the idea of venturing into wa-lolita but most of the skirts that you can buy will not stretch to my size once I tucked the kimono.

Fabric

As with all my lolita pieces they much be work friendly so it has to be made from something washable and dark coloured.

Luckily I went a bit overboard with the the purchase of black bi-stretch fabric so that is what I will use.

Design

First thing first one must study the hakama.


Lets look at the pleats as to me that defines its.

Here are the front pleats.


And here are the back pleats.


The most obvious difference between the two is the number of pleats, the front has 6 (one of the pleat is hidden under the centre one) and the back has 4.

The only way to show how the pleats work is with a diagram.


As you can see it is a bit complicated but how am I going to incorporate those pleats?  Well what is life if it was not for the challenges.

My starting point was this pattern minus the ruffles and the high waist part.


Then I inserted the pleats using a lot of masking tape.  Luckily I was decorating at the beginning of the year so a roll was at hand but I much buy some more.

Construction

First thing first I needed to re-thread my new toy!  My overlocker.


Now that is done, time to cut it out.


A straight line stitch on the inner pleat to hold it in place.


Side pleat pinned and ready to be stitched into place


And the ironed creased.  A lot of steam and a wet cloth was used to create this.


Oooo a closeup of the back pleat.  I had to stitch the back pleat together to check them in place.  Otherwise they would flap about and I could have made a mistake.


Time to join the back 3 panels.


And this is where my overlocker came in handy.  It finished off the edges so nicely,  I love my new overlocker, look how pretty the edges are.


Okay that is the back half of the skirt all done on to the front with more pleats.


Unfortunately no photos of the intermediate steps for the front panel as I was concentrating hard to make sure I ironed and stitched the right pleats.  


Here you can see what it looks like at the back and the stitch that is holding the pleats in place.


Don't worry, the yellow thread is to hold the pleats in place while I am making the skirt.  Seriously they really got in the way.

Okay the back and front are done,time to join them at the side.


The side seams didn't quite line up as nicely as I hoped.


The other side is a little better but still improvements for next time.


However not bad for a first time and I know where on the pattern to make it work.

Now the straps.  May have made a bit of a mistake in that the front straps are ridiculously long.  as in 4.5 metres in total.  Yeah next time make them shorter but at least they will go wrong my waist easily!

Yep you guessed it I forgot to take photos.  I only attached them just before dinner and I wanted them on so that afterwards I could take photos of what the skirt looks like on Miffy 2.


It is going according to plan, just the lace at the bottom and we are done.


Finished

And here it is!  I have to say it has turned out very well indeed.


An a-line lolita shirt with hakama pleats.  


I did find one advantage of long straps and its that I can tie a double bow which is super cute.


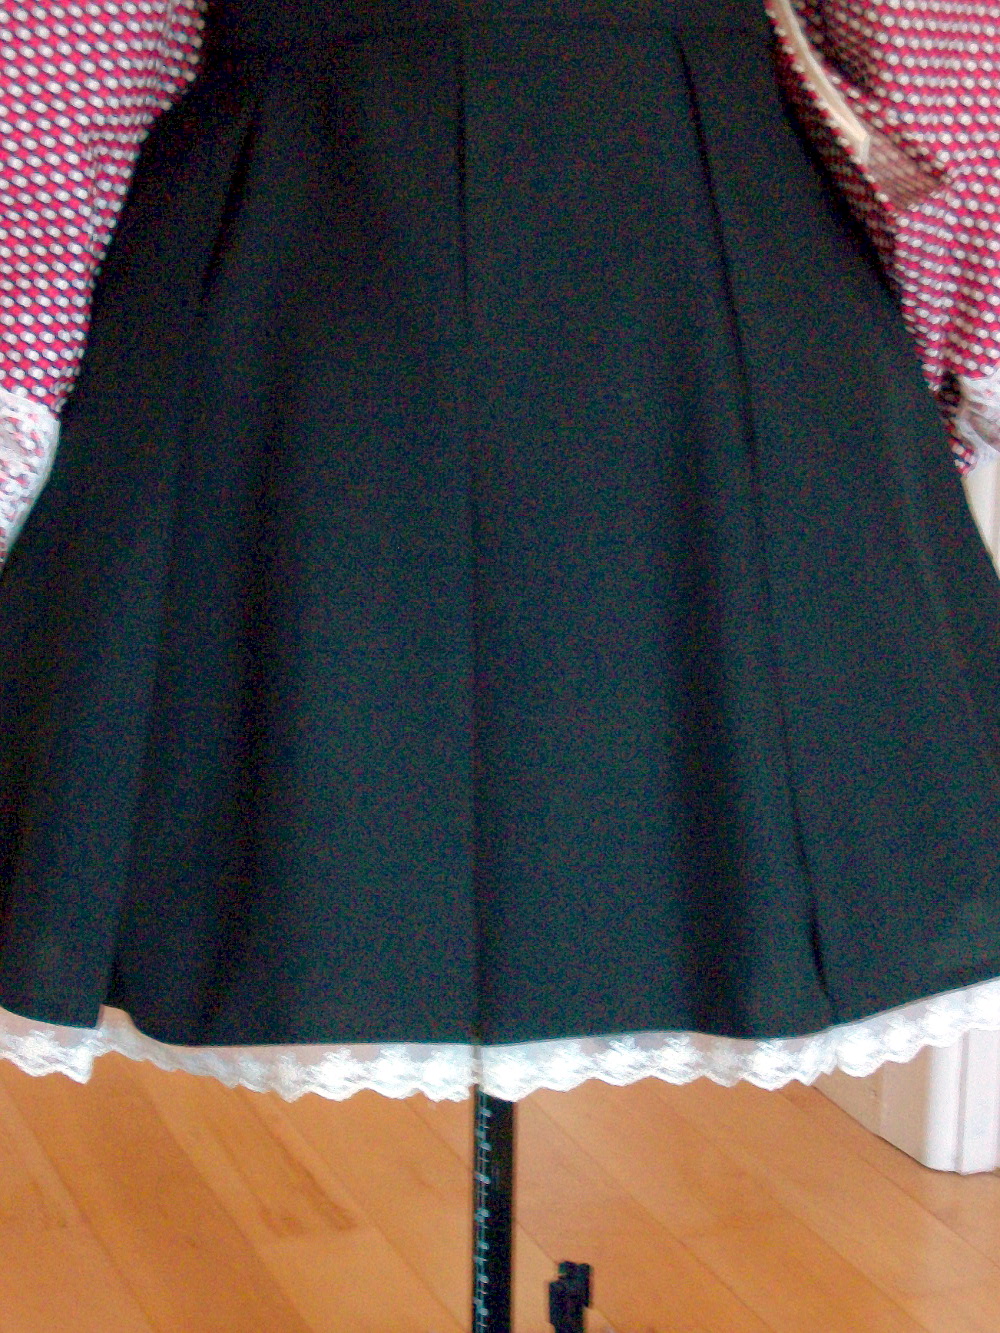
The lace at the bottom gives the skirt a nice edge I think.  Without it I think it would have looked too plain for lolita.


The pleats are holding well!


They are staying closed when they are not moved.


It is not very poffy the petticoat but I'm quite like it as suits me better for my day to day wear.


And here are the pleats opened.  Crisp and clean creases.


Here you can just about see the hidden middle pleat.


Now I have a work event on the 6th so I might wear it them.