Showing posts with label How to. Show all posts

6 March 2016

New Year and Making a Dress - Black and white Striped kimono!

Time has flown and as always the end of 2015 has been busy.

I had visited my kimono friends in Birmingham for the day.  I literally flew in and then out of Birmingham in one day.  I think I might not do that again.

Then at work we had our Christmas party which was a lot of fun.  Good food and good company all rounded off if a quiz and then a pub visit.

After that I had a few days of peace before flying back home to see family for Christmas.  Yes ate too much but I loved it.

But just before I left, I finally got back to sewing and I am going to make the most wanted kimono in my collection.

The black and white striped kimono!

I have seen one of these kimono a long time ago and I fell in love with the look but to buy one from Japan was just out of my wallet reach so the only solution was to make one.  Hmmmm that was not as easy as I thought.  Firstly finding fabric with stripes that were more then a couple of centimetres was tricky and secondly I wanted cotton fabric with a nice drape.

Okay with those conditions in mind, I went hunting and last year I succeed in finding the perfect fabric.

Now I had the fabric, it is time to make the kimono (6 months later).

As normal, I followed the method in my kimono book and made a hitoe (unlined) kimono.  It will be more versatile in my mind and I want to experiment in layering.

I did make a miscalculation in the amount of fabric that I brought.  I was told the fabric was 150cm and therefore brought 4 metres only.  BIG MISTAKES!  It turns out I only had 140cm to work with which ruined my original plans.  Especially the long 18cm by 200cm collar piece but I managed to work around it and got all the pieces I need.


At the back of my mind I wanted to practice my handsewing using the Japanese way of hold the needle but I had only just got over a cold and I was not up for the challenge so I did all the long seams on the sewing machine and then blind-hemmed all the seams by hand.

Strangely this kimono sewing went very smoothly.

Day one - Sewed the back and horizontal seam and sleeves.


Day two - Sewed the side seams and blind hemmed them down.
Day three - Attached okumi panels and again blind hemmed them.
Day four - Collar sewed down,


Day five - Sewed both sleeves.

Bearing in mind I only really work 7 hours per a day on sewing however it is done.


Now I have a black and white striped kimono all of my own :)

16 January 2012

How to make a Tsuke Obi

Someone asked for a tutorial on how I made my tsuke obi so here it is!

Here is the list of things you will need.

Two lots of 2 metres of fabric your choice (for reversible obi)
2 metres of stiff interface
4 metres of ribbon
Sewing Machine
Thread
Pins

Of course if you do not want to make a reversible obi then you just need 4 metres of one type of fabric.

Instructions

Step one
Take your fabric and place it so the right sides are touching.  Now we need to mark the pieces!

Here is the basis pattern that I used.

To lay out the pattern I would recommend the following.


This way you are using the fabric economically so you can use the remaining fabric for other projects like making more obi!

As the pattern is basically rectangles you can lay the pieces so they are edge to edge.

Step two

For the interface, you will need to cut the same shapes as above except the measurements are as follows.

Again lay them out on your interface like the fabric.

Step three

You now have all your pieces at hand.  If you have not ironed the fabric and interface beforehand, give them a quick once over.

Step Four

We will sew the tare part first.

Take your tare fabric pieces and line them up with the right side facing each other and sew.

Snip the corners like below and then turn it inside out.


Now iron your tare and then insert your interface. 

You have not completed your first part!

Step five

Take your ribbon and cut it into 1 metre lengths and then singe the edges if you have synthetic ribbon.  If you have natural ribbon then turn the end of each piece on one end only leaving the other end raw.

Now take your waist pieces and two ribbon pieces and lay out as follows.

  Making sure that the long edge of the ribbon is 1cm away from the edge of the fabric.


Now pin the edge or baste the fabric together and sew!


Make sure you don't catch the ribbon when you sew the thing together and also don't forget to leave a gap of 30cm to allow you to turn the waist band inside out.

Snip the 4 corners just like you did for the tare, turn it inside out and iron flat.

Time to insert your interface, this can be a little tricky but if you have left a 30cm gap there should be enough space for you to push your arm into the waist band and position the interface correct.

Once you are happy the interface is in the correct position, sew the opening closed as neat and as close to the edge as possible.  If you are worried that your ribbons will rip off from all the tugging then you can sew over the fabric and ribbon to give it extra strength.

 Your waist band of your tsuke obi is complete.

Step Six

I left the otaiko part the last because it is the trickiest if you are a beginner.

Take one piece of your otaiko and lay it out so the right side is facing up.

Now take your completed tare piece and your two remaining pieces of ribbon and layout as follow.  You will want the open end of the tare to be on the left hand side.

To make sure you have place the tare piece the correct way round, the matching colours should be touching.

Fold up the ribbon and tare piece so they are within the fabric boundary and lay the second fabric piece of otaiko on top.  Pin/baste the pieces together and sew.


Snip the top two corners, turn it inside out and iron it flat.

Now insert your interface and sew the opening closed.

And volia you have a tsuke obi.


27 November 2011

How to Plan a Wedding - Part Eight - Dear Diary......

Actually come to think about it, this should have been Part Five but my brain was a little tired.

So you thought about the time and venue for ceremony and reception (see what I mean about lists becoming lists!), time to think about what time of the year you want to get married.

Autumn, Spring, Summer or Winter?  What is the best season to get married in?  Is there a best time of year?


Unless your country experiences bad weather at certain time of the year, any time of the year is perfectly fine.  It all depends on what you want to do on your wedding.

Normally spring or summer is associated with outdoor weddings because the days are long and the weather is nice and warm.  Whereas autumn and winter are general considered suitable for indoor weddings.

However this is not a hard and fast rule!

So long as you have suitable clothing and heating, no one said you can't have an outdoor wedding in winter.  Just imagine having a wedding when there is snow on the ground or when the leaves are falling off the trees.  It will make wonderful photos!

Then again, if summer for you and the guest is just too hot to handle but you still want the long days to party then having an indoor wedding would be refreshing indeed.  And if any of your guests wish to enjoy the sun then they can venture out while you keep your cool in the venue.

I think technically, I had an autumn wedding but for some reason (maybe global warming) the weather in October was really nice.  In fact on the actual day, we had lovely sunshine and it was nice and warm throughout the day so I didn't have to worry about getting cold.

26 November 2011

How to Plan a Wedding - Part Seven - Location, Location, Location (Reception)

Hopefully you have an idea of where you would like to have your ceremony and now it is time to think about reception.

Here are a few things that went through my head when I was brainstorming for ideas.

  1. How far away from the ceremony should I go?
  2. What is the maximum and minimum number of guests?
  3. What is the food and drink like?
  4. Is it children friendly?
  5. Are there any local hotels in the vicinity for guests to stay?
  6. Is there adequate parking?
When you are answering these questions, think about the guests you are likely to invite.  It maybe your big day but considering the needs of your guest will make all the difference in how your wedding will be remembered.

Choosing a remote reception where the guests have to drive 20 minutes before trekking another 20 minutes may give you a unique reception but leaving your guest high and dry in the middle of nowhere and with little to eat or drink will not go down well.

This is far too remote!
I remember my mother complaining about one wedding where she really wanted a cup of tea but when she asked for one the staff didn't give her one because the bride and groom didn't think about refreshments after the wedding breakfast.  She does not have a positive memory of this wedding.

23 November 2011

How to Plan a Wedding - Part Four - What's the time Mr Wolf?

This can be a tricky question because there are a lot of factors that could affect your decision for the ceremony time.

From Black Country Metalworks 
You can get married anytime in the UK so long as the registrar or the religious official is free but when should you get married.

A morning wedding would suit a couple who are planning a small wedding where it is just you, your partner and some close family members and friends. The advantage of this is that when your ceremony is over, you can head straight to a reception for lunch and them spend the afternoon relaxing. However it does mean you have little time to get ready hence why I said it is suitable for a small wedding.

Then there is the afternoon wedding, this gives you plenty of time to round up your wedding party and get ready in relatively good time. Also if there is any issue that needs to be resolved, at least you have the time to get someone to sort it out. However should you get married before or after lunchtime? Before lunchtime then you will need to organise some sort of light refreshment while the photographs are being taken. Whereas after lunchtime then this is not an issue but then when do you want to serve the wedding breakfast?

Finally the evening wedding or at least before 17.00. This overcomes many of the issues raised in the previous paragraphs however do not be fooled. Even though your wedding is late afternoon, you will not be able to do anything in the morning because you will be preoccupied with you wedding.

Another thing to consider is how long you want your special day to last? If you want to go the whole hog and have the ceremony, wedding breakfast and evening disco then you will probably want to have an early afternoon wedding so you have time for your day to unravel. However this means your guest will have a long day and if you are like me and your guest list is mainly elderly relatives, having such a wedding would be too tiring.

So to summaries!

  • Think what wedding elements you want.
  • Choose a time for the ceremony which will allow you to fulfil your plans.
  • Consider the guests needs.

22 November 2011

How to Plan a Wedding - Part Three - Lists, Lists and Lists!

Now you know what you and your partner wants and also your parents.

Time to pull all this information together and create your first list which will detail what you need for this wedding to become a reality!

Things to think about : -
  1. Ceremony time
  2. Venue
  3. Formality
  4. Budget
  5. Potential guest list
  6. Legal details like marriage notices
Such a small list you may say but believe me from these 6 things you will be potentially creating another list for each one!

Tomorrow I will discuss ceremony time!


21 November 2011

How to Plan a Wedding - Part Two - Discussion with the parents.

So you both know what you want from the wedding.

I suppose now you need to discuss it with your parents.

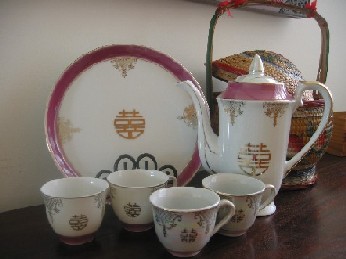
Now most parents are more then happy with whatever you want to do for the wedding but this is not always the case.  Maybe your parents would like it to be held at a particular location or maybe they would like to include an activity which is customary in their culture.  For example, my parents wanted a tea ceremony to be performed at the wedding.

Not the set that was used at my wedding but I don't have a picture of it.

Don't get upset by this and don't feel like they are going to take over your day.  It just means you have to accommodate their expectations.

And don't be afraid to mix cultures if you are in an inter-racial relationship.  There is always a way to add elements of one's culture in the big day, whether it is the way the venue is decorated or the food served.  These elements should be embraced on your big day because they will only make it more special and memorable.

So remember listen to what your parents have to say and make a note of what they would like you to do.

20 November 2011

How to plan a Wedding - Part One - Decision making

So what is the secret to planning a stress-free wedding?

Did we follow a magically book which told us how to plan the wedding?

Did we hire a wedding planner?

Maybe I had a moogle to magic me the day?


(Unfortunately the final option was not possible but if only it was, wouldn't it be great!)

Nope the secret is planning.  No really, I'm not joking, if you want anything to go well then planning is the secret and don't be fooled by other people who say it was stressful.  Once you have planned and put everything in place, it should all fall into place.

And despite what people keep throwing at us, never did we panic or worry about our wedding.  In fact, we managed to annoyed people with our relaxed attitude.  However we could afforded to be relaxed because we had planned it to be this way.

Now no matter how spontaneous your wedding is, a degree of planning is needed and before we began to make any lists, budgets or announcing our engagement to our parents, we did the most important thing an engaged couple should do.

We both discussed what we want for the big day!

Yes we sat down and talked about what we would like.  No paper, no computer, nothing!  We just talked about how we both wanted a calm and relaxing day without too much pomp and for the ceremony itself to be as simple as possible.

This discussion proved to us that we both wanted the same thing out of our wedding and setup a nice solid foundation for all our plans.

So why not do the same?  It can be as formal as you want or you can just keep it casual.  How you do it isn't important but rather the outcome of the conversation that is key.