So I have been a little quiet in the kanzashi scene because of the regency event but now I have some free time I thought I would get back on the kanzashi making.
Kusudama is one of my favourite kanzashi to make. They are just adorable to look at.
These ones are a little different to the ones I use to make in that they are brooches as well.
And since it is Autumn / Fall, I thought it would be nice to make them in the colours of the seasons.
The grey one is particular apt for me since I am going to be seeing grey skies for a long time.
But then again, seeing the golden leaves in the Botanical Garden is quite nice.
And purple because I love purple.
https://www.etsy.com/uk/listing/250389357/felt-kanzashi-brooch-hairclip-for
A blog for my sewing, kanzashi and all other fun projects that I do. www.kittykanzashi.etsy.com
6 October 2015
22 September 2015
Epic Regency Sewing Project - Red and White Striped Spencer Jacket and matching bonnet
The outfit for the ball is finished. I suppose I should now make my spencer jacket.
But what sort....I could make the standard looking ones which end at the bust but how about something unusual like the pointed ones.
Well why not! I am going to make it out of red and white stripes so I am going to stand out so why stop at the design being unusual.
Yes as you guess, I had to draft this one as well from my basic sense and sensibility pattern. Getting my money's worth from this pattern but it does show how versatile it is.
Now I had a slight delay in that the fabric, in that I was delivered the wrong fabric. However I contacted the seller and they said they would send me the correct fabric that day and that I could keep the other one. Woo hoo.
I always order too much of a fabric just in case and yep far too much but never fear the rest will be made into a lolita dress most likely.
Snip here and there.
I will need to cut another set of bodice pieces to act as a lining but first lets put these together.
Opps slight accident in poking the tails through so I will have to make this the underside.
Now to put on the sleeves. Now this can either go well or become my nightmare.
I have to admit the jacket reminds me of a circus ringmaster but it is cute. Now to get a matching bonnet sorted.
Hehehe this was actually more fun then it should be and I managed to salvage the straw bow.
Next I cut a huge circle for the head and then gathered it. Sorry no pictures of this as I forgot and I also forgot to take pictures of me making the pleated trim.
However I simply followed the steps from Kleidung um 1800.
http://kleidungum1800.blogspot.co.uk/2012/07/zuckergu-ist-ein-mu.html?showComment=1342221544121
OMG it took forever......I was seriously tired after making this small piece but it does look cute.
I thought it was best to also stitch the visor at the back together as I didn't not want to put too much strain on the fabric and trim.
Yes when I said I made a small piece, I really did mean I made a small piece as I had a gap. However this is not a problem as I will cover the gap with the salvage straw bow.
But what sort....I could make the standard looking ones which end at the bust but how about something unusual like the pointed ones.
Well why not! I am going to make it out of red and white stripes so I am going to stand out so why stop at the design being unusual.
Yes as you guess, I had to draft this one as well from my basic sense and sensibility pattern. Getting my money's worth from this pattern but it does show how versatile it is.
Now I had a slight delay in that the fabric, in that I was delivered the wrong fabric. However I contacted the seller and they said they would send me the correct fabric that day and that I could keep the other one. Woo hoo.
I always order too much of a fabric just in case and yep far too much but never fear the rest will be made into a lolita dress most likely.
Snip here and there.
I will need to cut another set of bodice pieces to act as a lining but first lets put these together.
Not looking bad. I suppose it is time to cut the other pieces and these together.
Opps slight accident in poking the tails through so I will have to make this the underside.
Now to put on the sleeves. Now this can either go well or become my nightmare.
Second sleeve on! And it is done.
I have to admit the jacket reminds me of a circus ringmaster but it is cute. Now to get a matching bonnet sorted.
My original plan is to make a bonnet similar to this one.
However the sun visor I brought is a little big.
So instead I will opt for a capote.
Yep something like my turban but with a brim and not so poffy. It will look more like a bonnet.
I will be following instructions from Koshka the Cat http://www.koshka-the-cat.com/capote.html to make my one expect I will have a straw brim.
So first thing first. Take apart the sun visor.
Hehehe this was actually more fun then it should be and I managed to salvage the straw bow.
Next I cut a huge circle for the head and then gathered it. Sorry no pictures of this as I forgot and I also forgot to take pictures of me making the pleated trim.
However I simply followed the steps from Kleidung um 1800.
http://kleidungum1800.blogspot.co.uk/2012/07/zuckergu-ist-ein-mu.html?showComment=1342221544121
OMG it took forever......I was seriously tired after making this small piece but it does look cute.
Here is the basic bonnet put together with the trim.
I thought it was best to also stitch the visor at the back together as I didn't not want to put too much strain on the fabric and trim.
Yes when I said I made a small piece, I really did mean I made a small piece as I had a gap. However this is not a problem as I will cover the gap with the salvage straw bow.
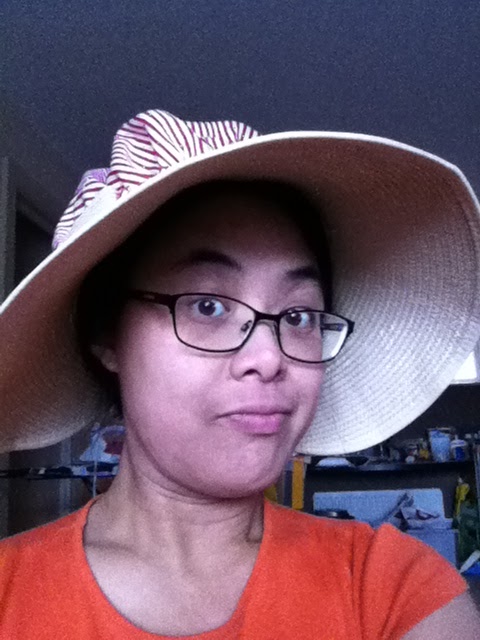
Me just trying it out for size. Is it me or does it look huge?
I seem to have mis-filed my photos for the completed bonnet because I only finished the bonnet a couple of days before the event. They are hopefully on my camera.
Next post will be about the event itself.
28 August 2015
Epic Regency Sewing Project - Green Sari Overdress and Turban.
Now it is time to step into unknown territory. Eeeeekkkkk!!!!!
I have been research overdress quite a lot on Pinterest and most people seem to use Jane Arnold's patterns of fashion book.
However I do not have this book so taking a rough guess of what the pattern needs in terms of pleats I decided the best way to make this would be to draft it.
Once again using sense and sensibility pattern I cut out only the bodice and marked out where the dress will be.
Now to makw things simply I am only going to add pleats at the seams.
But before I cut my sari I needed to make the lining. I used some green cotton poplin for this.
Making sure it looked okay since this will be used as a bases for the sari but more important snug.
Now to actually cut the sari.
I only had one chance at this so I made sure the length and position of the pleats were correct.
there was not enough width to have pleats at all the seams so I just had them at the back and then a small pleat at the side which looks more like a dart.
Oh this is getting scary.
I wanted the border to go all the way round the back hence the long bit. Yeah no idea how that is going to work out.
So let the sewing begin.
That is the pleats secured and time to attach it to the lining.
Oh dear!
Yep I did not cut enough of the border, will need to get that fixed.
Hmmm looking not bad.
Getting the edges all tucked in and the pleats on the border sewed down.
Yes all the edges done apart from that little gap at the top.
Yes this looks good!
Now to make my turban or a big puffy cap.
No way was I going to make a template for this so what I did was fold the fabric half, then in quarters, and so on until it was a small enough for me to mark it in a few places. Similar to how you would make a cartouche for cooking!
And voila!!! One massive circle. Now I just need to attach it to a piece of the border and I have a turban.
Needs gold feathers I think.
Now to finish off my sari with a closure around the front and fix up the back.
You wouldn't know that I made a mistake here. hehehehe!
27 August 2015
Epic Regency Sewing Project - Muslin Dress
Now we have the foundations ready (ish).
Time to make the dress. My first muslin dress!
It is about time I made one of these as it is a long time coming. I have already made a standard regency dress but this time I wanted to tweek the design.
Here is a rough sketch of what was in my head. Sort of a chemise-like regency dress.
Now I only had the sense and sensibility regency gown pattern but that shouldn't be a problem. I cut out the bodice pieces but made sure that the front pieces was extra wide to create the gathers around the front. And altered the sleeves to elbow length.
It is always a tense moment when I am cutting fabric but I did buy a ridiculous amount of muslin for stupid mistake.
Time to make the dress. My first muslin dress!
It is about time I made one of these as it is a long time coming. I have already made a standard regency dress but this time I wanted to tweek the design.
Here is a rough sketch of what was in my head. Sort of a chemise-like regency dress.
Now I only had the sense and sensibility regency gown pattern but that shouldn't be a problem. I cut out the bodice pieces but made sure that the front pieces was extra wide to create the gathers around the front. And altered the sleeves to elbow length.
It is always a tense moment when I am cutting fabric but I did buy a ridiculous amount of muslin for stupid mistake.
Here is the lining pinned to my Miffy just to make sure things are working out.
Then the top layer is gathered just to see if it looked fine.
Then once the bodice looked reasonable the skirt part was attached.
Hmmm not bad.
And finally the sleeves! Rather then creating ordinary hems I decided to give shell hemming a try and it I am pleased to say that it worked nicely.
I gauged it by eye rather then measuring out the intervals since I did not want to mark my white muslin if I could avoid it.
I have left the bottom hem unfinished as I wanted to make sure the overdress (which is the next project) were both the same length but also I wanted to shell hem the bottom as well and I was a bit tired to do it now.
25 August 2015
Adventures in felt kanzashi - part 8
I have a soft spot for kusudama kanzashi because they appeal to my inner mathematician.
The rotational symmetry is just nice.
So when I brought a bag of mixed felt I knew I had to make one.
However, time is never on my side and it is only now that I managed to actually make my idea become a reality.
They are so cute and soft just like the rest of my felt kanzashi.
18 August 2015
Epic Regency Sewing Project - Under things
Since I am turning up to a real regency event, I thought it was time I made myself some period underwear.
Which means a chemise and short stay.
I used the Sense and Sensibility pattern which my friend very kindly leant to me.
So the first thing to make was the chemise because it looked the easiest and it was.
The binding around the collar needs a little work as I did not catch all the seam underneath it and it is pulling away however I might cheap here and take off the muslin binding and use shop brought binding. It will not be as soft but my homemade muslin is a pain to use.
Next the short stay.
Since I don't have a big chest I went with comfort hence the short stay. I have to admit this is my first time making stay and I had my fingers crossed through the whole sewing.
For a first time it is not too bad. I think next time I will use more boning and make the cups a little bigger but I am not sure. I will need to do a little bit more research here.
And no, there will be no pictures of me wearing this but here is what they looked like.
Which means a chemise and short stay.
I used the Sense and Sensibility pattern which my friend very kindly leant to me.
So the first thing to make was the chemise because it looked the easiest and it was.
Next the short stay.
Since I don't have a big chest I went with comfort hence the short stay. I have to admit this is my first time making stay and I had my fingers crossed through the whole sewing.
For a first time it is not too bad. I think next time I will use more boning and make the cups a little bigger but I am not sure. I will need to do a little bit more research here.
And no, there will be no pictures of me wearing this but here is what they looked like.
Unfortunately in my haste to get this finished I did take any picture. However the rest of my project will have more photos I promise.
7 August 2015
Epic Regency Sewing Project - Introduction
Back in 2014, one of my friends attended the Jane Austen Regency Festival at Bath and someone suggest that the following year we should organise a girlie weekend.
Well I am all up for a dress up especially in Regency.
Who would not like to get all pretty for the weekend.
So thus begins the organising! We originally thought about hotels but then it occurred to me that since there are 5 of us, we might be able to rent an apartment for the weekend and it could be cheaper. Not that we will need to worry about food since we will be out for most of the time and it would be handy with getting ready.
We ended up settling for a regency looking place, well we are attending a regency event so once that is sorted time to think about clothes.
What am I going to wear?
Fortunately my To Do list for sewing is really long and one of the many dresses I have been meaning to make is a muslin dress. Okay day dress sorted, and of course one must have a spencer jacket and bonnet to accompany.
But what to wear for ball, oh such a question to ask and very apt. Should I make another dress? Hmmmm but then I would have a huge headache on making it all fancy. However while browsing pinterest, I saw the answer, an overdress. That is it, I will make an overdress which will be worn over my muslin day dress and then make a matching turban.
Of course I will need shoes and bags but they will be made along the way.
Time to source material.
Well I am all up for a dress up especially in Regency.
Who would not like to get all pretty for the weekend.
So thus begins the organising! We originally thought about hotels but then it occurred to me that since there are 5 of us, we might be able to rent an apartment for the weekend and it could be cheaper. Not that we will need to worry about food since we will be out for most of the time and it would be handy with getting ready.
We ended up settling for a regency looking place, well we are attending a regency event so once that is sorted time to think about clothes.
What am I going to wear?
Fortunately my To Do list for sewing is really long and one of the many dresses I have been meaning to make is a muslin dress. Okay day dress sorted, and of course one must have a spencer jacket and bonnet to accompany.
But what to wear for ball, oh such a question to ask and very apt. Should I make another dress? Hmmmm but then I would have a huge headache on making it all fancy. However while browsing pinterest, I saw the answer, an overdress. That is it, I will make an overdress which will be worn over my muslin day dress and then make a matching turban.
Of course I will need shoes and bags but they will be made along the way.
Time to source material.
Subscribe to:
Posts (Atom)